Bench Seat Cut-out
When installing my Marlin double transfer case, I was faced with the problem of how to clear the second shifter. I was planning to install bucket seats down the road, but I needed a quicker solution to work with my existing bench seat. I removed the bench seat from the truck, and pulled the fabric & foam away from the seat frame by removing the hog rings used to hold it together. Once I had this out of the way, I cut a slit in the center of the frame of the seat almost all the way to the back of the seat. I used some 1" square tubing to build an "H" shaped section, with the center of the "H" offset about 3/4 of the way to the back. I place this "H" in to the slot I cut in the seat frame & welded it back together. Make sure you do this with some care, as this "H" is now the main support that holds the seat in one piece.
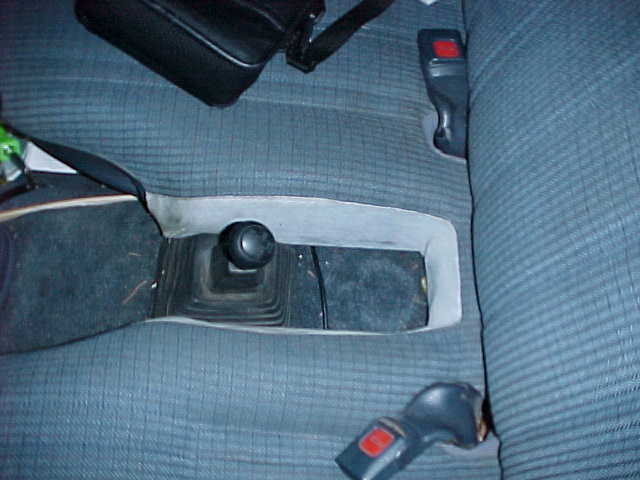
Once the frame was finished, I reinstalled the seat cushion and fabric. Instead of using the old hog rings, I used zip ties. These were much easier to work with, and allowed you to adjust the seat fabric's tightness over time. Then, using the "H" as my guide, I carefully cut the fabric & foam to the desired shape for the seat cut-out.
Ok, here is the hard part -sewing in a new piece of fabric to fit the shape of the new cut-out. Since I was in a hurry, I used the material from a pair of blue jeans. The color matched the blue interior pretty well, and that stuff is pretty durable too. It took a few hours to carefully hand sew the fabric in place, but I am pretty pleased with the end result.
My seat has been like this for over a year now, and it has held up well. Part of the reason I cut it back so far was that when my wife drives the truck, she has to move the seat way forward to reach the gas & brake - this still leaves plenty of room for the seat to be adjusted all the way forward or back.
| This page last modified 07/10/03 |
Questions? Concerns? email DRM |